Tuesday, August 20, 2013

What is it? Why, It's an Art Attack!

The other day at work my boss was showing me how to take the adhesive paper off of pre-cut Plexiglas and he was adamant about two things: not touching the glass on either side with your fingers once you've removed the paper, and making sure to pull the adhesive covering paper down slowly so that little particles don't fling onto the glass and get stuck. After having removed quite a lot of the protective adhesive papers, my boss walked by and decided to "show [me] something really neat you can do with the paper once you've removed it".  He slowly and fluidly removed the paper off one of the sides of a piece of Plexiglas and did so in a way in which allowed the paper to curl into a funnel. He then proceeded to throw it onto the workbench, and repeated these curling and throwing motions until he had lovely artsy looking pile. In case you are wondering, these protective adhesive papers are exactly what they sound like- sticky!  He then proceeded to tell me that he had once stacked up over 200 of the adhesive papers and that it really did look like a beautiful modern art sculpture.

I was intrigued by this and therefore began to make my own pile of these rolled papers until even I- a simple lowly inexperience trophy building serf was able to create my very own work of art.  Further inspired by the idea of off shapes and modern looking art piles, I also made a haphazardly constructed pile of engraved 1"x3"metal plates that I spent the majority of this morning "lifting" off of resin awards.

Check out my modern creations below, and feel free to comment/e-mail..

XOXO

Adhesive paper tower...
 yes its sitting on the very full shop garbage can.

Pile of engraved plates.
I call it... Scrap Metal.. lol
The paper is a brownish colour.. 

Close up of the engraving... 

Glorious B&W 

Wednesday, August 14, 2013

The Best Gift I've Ever Made...

If you like Superman, you'll definitely enjoy this post...

I wanted to do something really special for my b-f's birthday but it wasn't until two days prior to our arranged celebration that I got the most perfect idea.  Anyone who knows my best-friend is well aware of their obsession with anything and everything Superman, and it was through this epic comic symbol that I found my inspiration.  I'll admit this gift wasn't the most inventive or "out-of-the-box" as I might have done, but it definitely did the trick and I received the best response ever.. in fact it was a rather wide-eyed child-like (**note here I said child-like, not childish... just to clarify**) reaction- I got an uncountable amount of hugs and squeals and of-course the shock and awe looks I was hoping for.  I believe bringing a 28 year old to tears says it all...

Is your curiosity beginning to peak??

Well, allow me to put you out of your misery and divulge the object of such an amazing response..

*Drum Roll Please!*


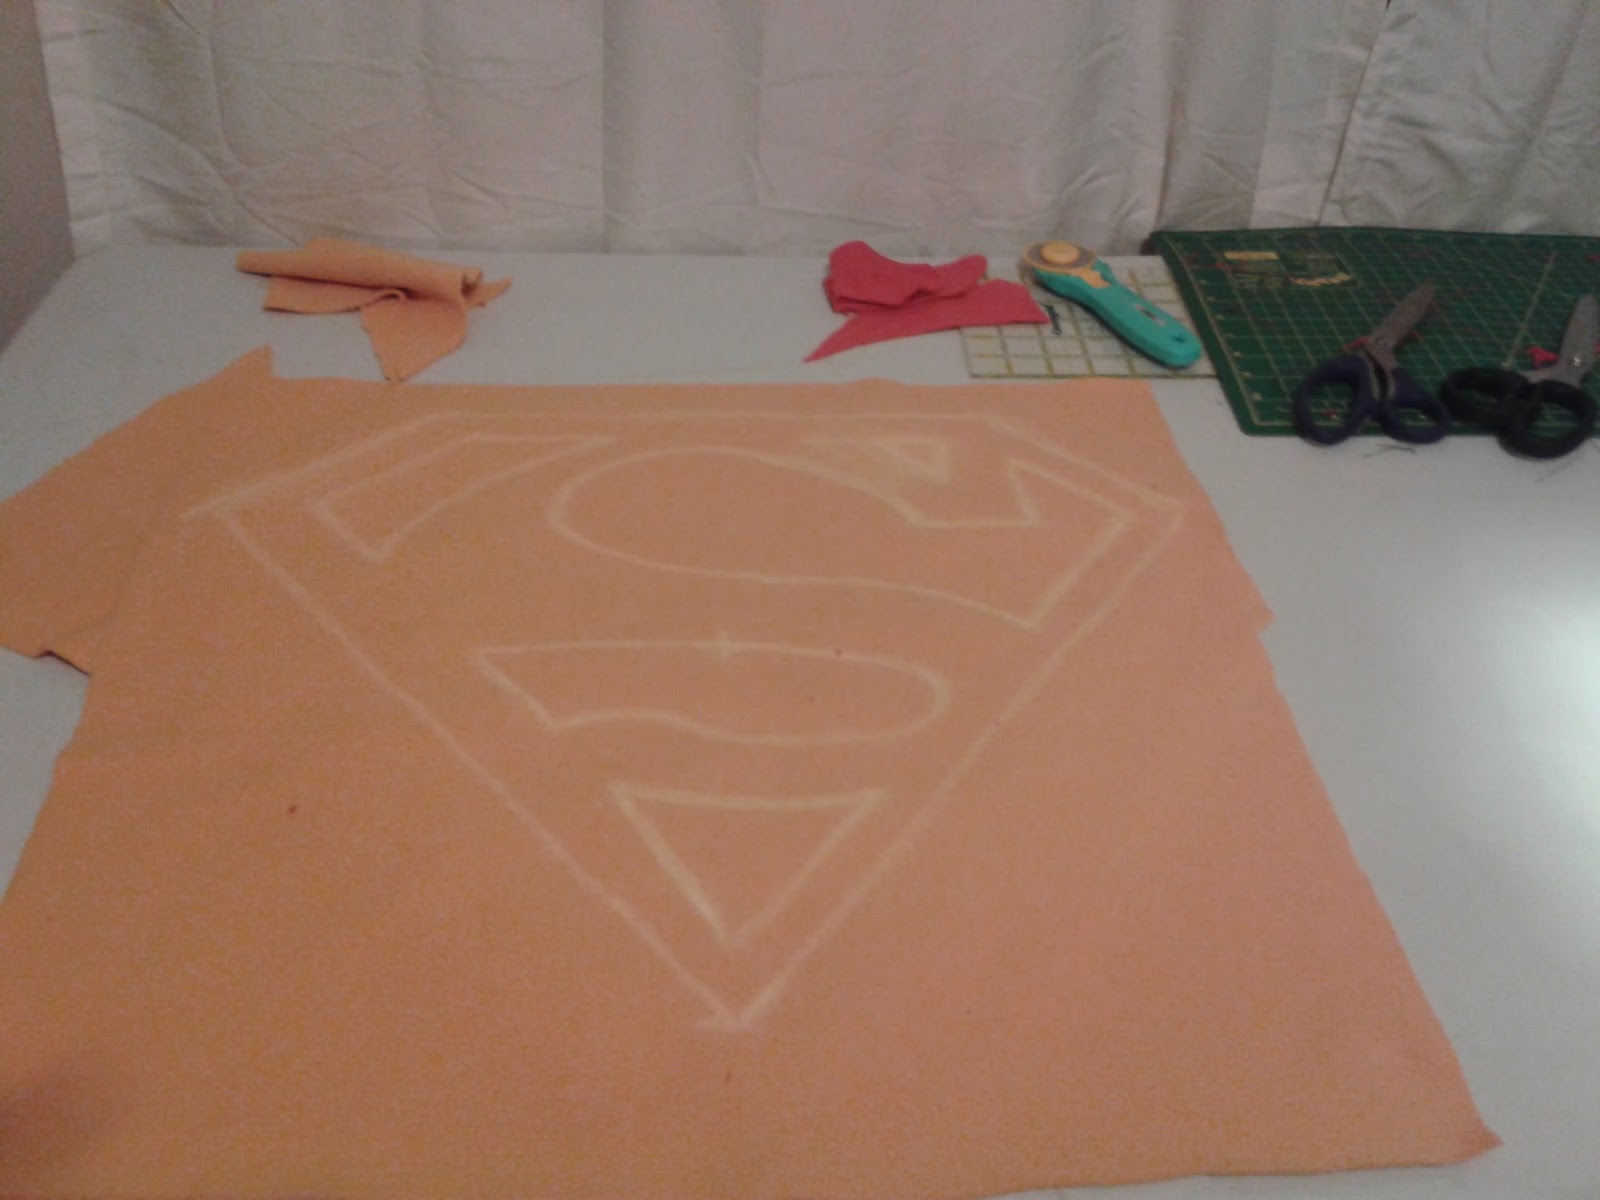
Vintage Superman Logo Blanket!!
This was one of the most difficult things I have ever attempted to sew, but it came out really really well and I am proud of it. I would like to show you the step-by-steps of this project.. IF you are interested in knowing more about this creation please feel free to comment or e-mail and I'll be more than happy to give whatever info I can that isn't on here already :) 

It all began with this symbol which I printed off from the internet.
Then I traced it freehand with chalk onto yellow fabric. 
Then I turned the yellow square over onto the red fabric
and patted it to transfer the chalk onto the red for the outline.
I placed the cut out symbol onto another piece of yellow fabric
and cut the yellow roughly to fit the red.

Action shot of me cutting with my rotary blade,
cutting mat and transparent grid ruler :)
I then sewed the red symbol to the yellow backing,
stitching around and along all the edges and curves.

I brought the symbol to my stretched out blue fabric
and removed the pins which I had put previously
to plot the middle of the blanket.

I took the fabric all back to my machine and carefully sewed the symbol onto the blue.
Not sure if you can tell, but this is the outline of the symbol
on the reverse side of the fabric- I'm sorry it isn't terribly apparent. 
I had bought 3 meters of fabric and doubled it over
leaving me with only three ends to sew closed.
 I turned the fabric inside out and sewed the two side ends completely closed.

While attempting to turn the fabric back out again,
I had gathered it up like you would a pillowcase or a paper bag,
and ended up inside of it. *hehe*


I then closed the bottom end and sewed an edge around the entire blanket in red thread.

Action shot of my presser foot :D

And there you have it... the best blanket in the world made for the bestest best friend in the world :) 

I hope you enjoyed reading my step-by-step and seeing my amazing feat of sewing... It even earned me a shout-out on the social media network everyone takes at "face" value ;) 

Next up on the blogging list; my first attempt at a denim rag quilt! 

<3