
If not then by now you've certainly read my post about the superman blanket for my bf... haven't you? It doesn't entirely qualify as a quilt, but rather as a hand pieced applique blanket. Either way...

Well I just completed my first true quilting project- a 3x3ft table square, which I have to say was not fun but very fulfilling. It started off a bit crazy, having to find a pattern for my quilt top (that's the top part and most intricate of the three layer "quilt sandwich") and then having to figure out the size for each small square plus how much border width i'd need to ensure it turned out a decent size post-quilting. I'm so very proud of myself for it and am so thankful that YouTube exists sometimes! Without the internet at large I never would have run into Jenny from the Missouri Star Quilt Company who not only taught me what to do with a jellyroll, but inspired to me reach the finish line of my own jellyroll race- i'm not talking doughtnut here folks- to come out with a successful and attractive quilt top which i'll show you another time *teehee*.
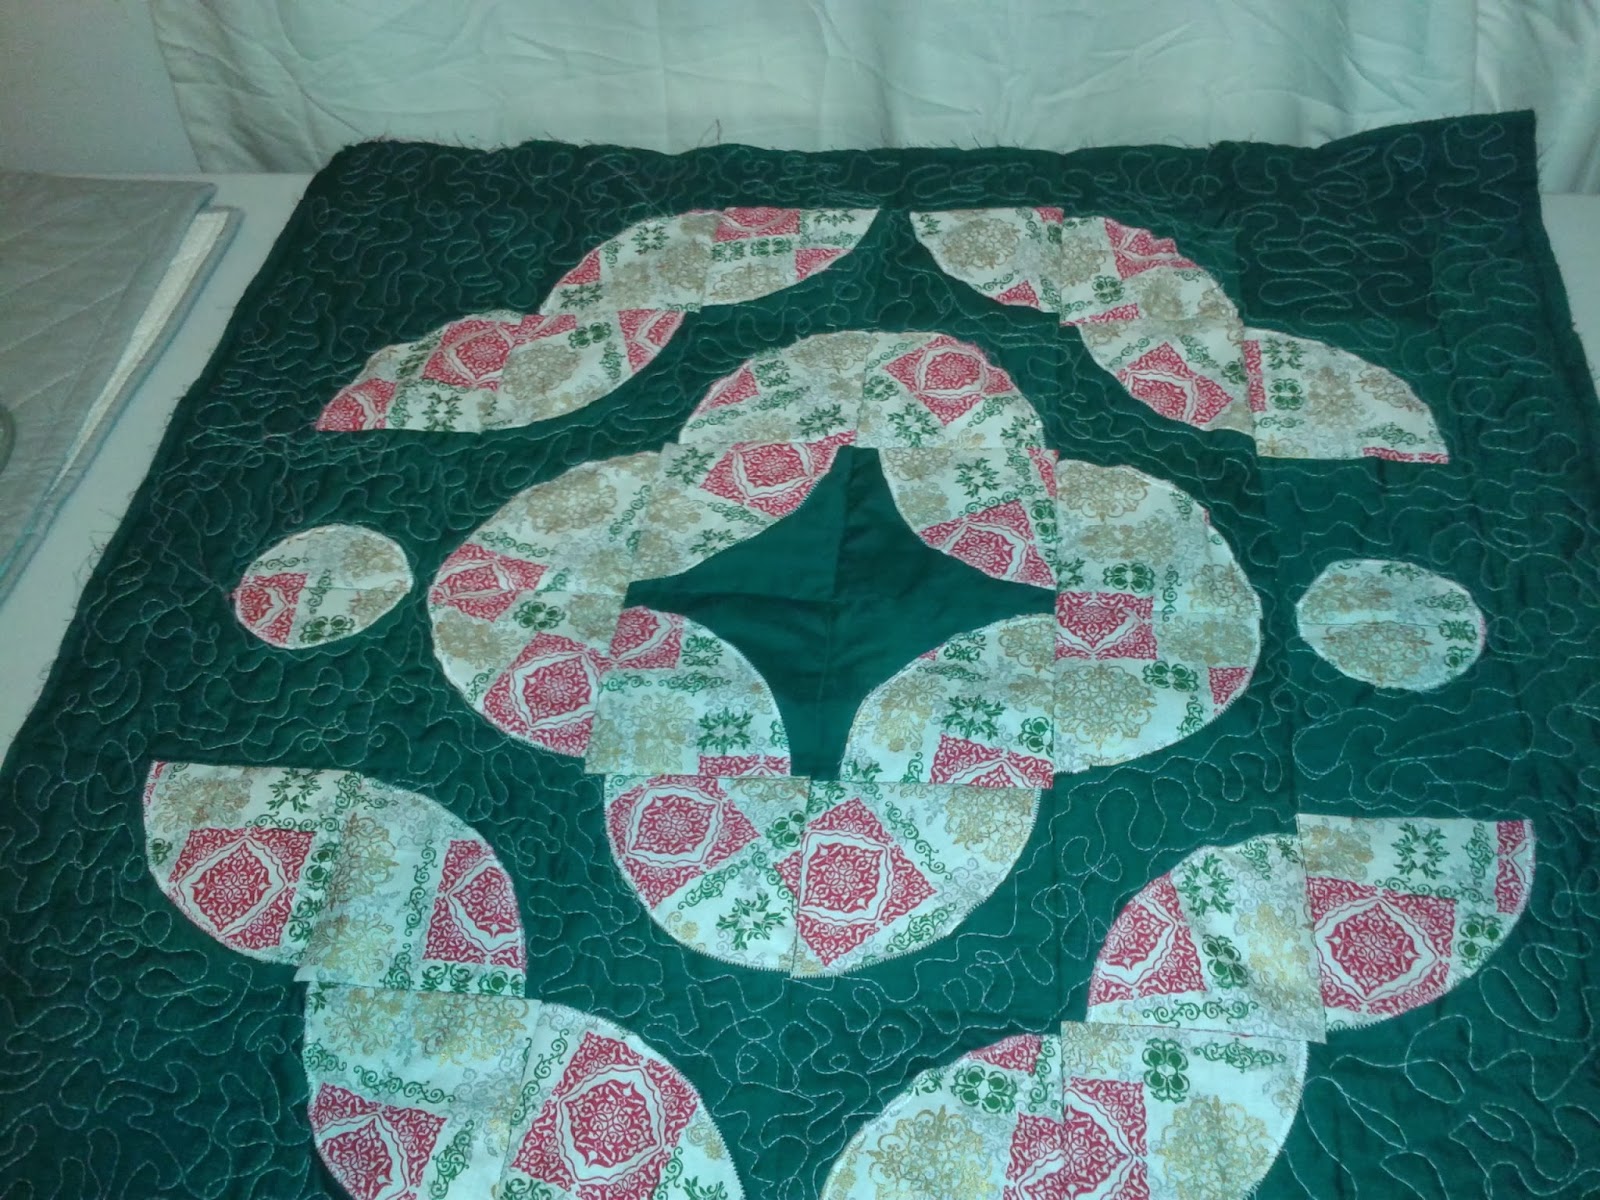
The quilt pattern that I chose to use on this project is called The Drunkard's Path and is easily made up using circles that get sewn onto squares and cut into four pieces. Each pie shaped piece of 1/4 circle on 1/4 square gets used in a variety of directional ways to eventually make a pattern that is wobbly and curvy and interesting. Once I pieced out my pattern, sewed my centre "medallion" together- its one of the shapes you can make using the pieces for Drunkards Path- and figured out what to do with the bordering before attaching it all to a cotton backing that was pre-batted, the rest was easier than pie. While I understand that I cheated a little by using a piece of fabric with batting already sewed on, it saved me a lot of time and effort. Choosing and purchasing batting for quilts is harder than you may think... and for a project as small as this, I figured I could get the best out of both worlds when I found a festive cotton backed batting for $5 a meter at Fabricland and only had to get the full meter. It definitely gave me an advantage and I was able to quickly learn how to work with this kind of fabric.
 |
| The first two fabrics were used to make my quilt top and the very red and gold fabric was my pre-batting'd backing. |
Once the "3" pieces of my quilt sandwich were attached securely- remember quilt sandwiches are made up of 3 layers: the quilt top, the batting and the backing- I decided to "stitch in the ditch" since my quilt top had the seam lines running vertically and horizontally already from each of my attached squares- Id read that it adds extra security before quilting and I was not disappointed. From there I went on to apply a sort of basic wobbly quilting stitch that i'd watched some videos about. The stitch I ended up doing comes from a meshing of two types of quilting stitch: a wobbly curving stitch called Stippling and another one that employs looping as its main attraction and is usually paired with heart shapes. I then cut my bias tape, with mediocre help from a male quilter on youtube- hold up! allow me to note here that I LOVE that men are quilting,I just didn't appreciate how vague this particular male quilter was- chain stitching each bias cut strip to make one long strip [Thanks Jenny@MSQ!!] which then got folded in half and ironed so it would stay put while I attached it to the edge of my quilted table square.
Here are some pics of my step by step quilted Christmas table square.. Crazy right?
 |
| Simplicity EZ Quilting Circle Cutter |
 |
| What pretty circles it allows one to cut :) |
 |
| I attached my circle to the square with a tight zig-zag stitch. |
 |
| Then I cut it into four even quarters. |
 |
| I started my Medallion from the middle outward.. this is the very centre. |
 |
| and then I added on... |
 |
| and added on... |
 |
| and added on.. |
 |
| until I ran out of drunkard path squares. |
 |
| Then I cut two small circles and another 6 small green squares to finish off the topper. |
 |
| This is the reverse side.. looks kinda neat too |
 |
| This was my first attempt at freemotion quilting on scraps. |
 |
| I stippled and looped all over with my newly acquired free motion foot |
 |
| This is my free motion quilting foot in motion :) |
 |
| I wobbled and looped thread all over the green, leaving the very centre for last and ignoring the patterned fabric deliberately. |
 |
| After filling in the centre of green space with my quilt pattern, I attached my home made bias tape to the front side... |
 |
| I tucked it around to the back and stitched again to finish. The Finished Piece :) |
Never in my life did I think I could create something like this, but I am so glad that I tried it because I am totally in love with quilting! I have made more trips to the fabric district of this city in the past 3 weeks then I have in my 5 years of machine sewing. For this project alone I made 3 trips for fabric and 2 trips for supplies. I purchased an extension table for my machine- which has not come in from Nova yet- along with the fabulous little free-motion quilting foot that is pictured above. I have bought another rotary blade: It's an 18" blade specifically designed for the circle cutter I have, and I had to buy it on Etsy.com because no one sells it in Canada and the Simplicity website won't ship here.. Thank you Alice from AliceInStitches!! And I bought a longer omnigrid see-thru ruler. Among countless spools of thread, and different quilters cottons, my new sewing room is holding up to "hurricane Quilty" that hit it this month *teehee*, and my Janome SUV1108 is getting a much needed workout :)
Oh yeah... I converted the computer room into a usable sewing space- I got rid of the old broken futon and have some more fabric storage. More to come on that later..
I've got at least two more quilts to work through between now and Christmas Eve and I can't wait to get started!! I'm going to be doing a crazy drunkards path quilt for one of them, and the other is going to be either a basic 9 patch block quilt or a log cabin.. still not sure. The hardest part about quilting so far for me is coming up with the overall layout for my blocks. Anyway I hope to be posting again soon about it all.
If you don't have a hobby but would like one- budget depending- then you should try quilting.. it can be done by machine or by hand because honestly all you need is a strong needle, thread, scissors and fabric. The only downside to quilting is that it can be truly expensive by the time you've chosen your fabrics and bought your batting etc. But if your like most quilters you'll either do them to sell them or for people that you care about which makes it all worth while :)
SO its onward and upward, to the cutting table I go, armed with rotary blade and circle cutter and determined to cut most of my block pieces before church tonight *hehe*. Thanks for reading..
XOXO
C